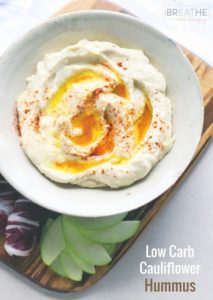
hCG Phase3 &,4 Low Carb Cauliflower Hummus Recipe

I have been missing hummus in a major way lately, and finally got around to trying this experiment with cauliflower to stand in for the chickpeas.  I noticed recently that my low carb cauliflower puree has the consistency of hummus when cold, and thought if I added just the right ingredients I could mask the cauliflower flavor enough to convince people that it was the real thing.

INGREDIENTS
  • 3 cups raw cauliflower florets
  • 2 Tbsp water
  • 2 Tbsp coconut oil
  • ½ tsp salt
  • 3 whole garlic cloves
  • 1.5 Tbsp Tahini paste
  • 3 Tbsp lemon juice
  • 2 raw garlic cloves, crushed (in addition to above)
  • 3 Tbsp extra virgin olive oil
  • ¾ tsp kosher salt
  • smoked paprika and extra olive oil for serving
INSTRUCTIONS
  1. Combine the cauliflower, water, 2 Tbsp avocado or olive oil, ½ tsp kosher salt, and 3 whole garlic cloves to a microwave safe dish. Microwave for about 15 minutes – or until softened and darkened in color.
  2. Put the cauliflower mixture into a magic bullet, blender, or food processor and blend. Add the tahini paste, lemon juice, 2 raw garlic cloves, 3 Tbsp olive oil, and ¾ tsp kosher salt. Blend until mostly smooth. Taste and adjust seasoning as necessary.
  3. To serve, place the hummus in a bowl and drizzle with extra virgin olive oil and a sprinkle of paprika. Use thinly sliced tart apples, celery sticks, raw radish chips, or other vegges to dip with.
NOTES
Approx. nutrition info per ¼ cup: 141 calories, 14g fat, 3.5g net carbs, 2g protein

hCG Phase3 &,4 Low Carb Cauliflower Hummus Recipe

I have been missing hummus in a major way lately, and finally got around to trying this experiment with cauliflower to stand in for the chickpeas.  I noticed recently that my low carb cauliflower puree has the consistency of hummus when cold, and thought if I added just the right ingredients I could mask the cauliflower flavor enough to convince people that it was the real thing.

INGREDIENTS
  • 3 cups raw cauliflower florets
  • 2 Tbsp water
  • 2 Tbsp coconut oil
  • ½ tsp salt
  • 3 whole garlic cloves
  • 1.5 Tbsp Tahini paste
  • 3 Tbsp lemon juice
  • 2 raw garlic cloves, crushed (in addition to above)
  • 3 Tbsp extra virgin olive oil
  • ¾ tsp kosher salt
  • smoked paprika and extra olive oil for serving
INSTRUCTIONS
  1. Combine the cauliflower, water, 2 Tbsp avocado or olive oil, ½ tsp kosher salt, and 3 whole garlic cloves to a microwave safe dish. Microwave for about 15 minutes – or until softened and darkened in color.
  2. Put the cauliflower mixture into a magic bullet, blender, or food processor and blend. Add the tahini paste, lemon juice, 2 raw garlic cloves, 3 Tbsp olive oil, and ¾ tsp kosher salt. Blend until mostly smooth. Taste and adjust seasoning as necessary.
  3. To serve, place the hummus in a bowl and drizzle with extra virgin olive oil and a sprinkle of paprika. Use thinly sliced tart apples, celery sticks, raw radish chips, or other vegges to dip with.
NOTES
Approx. nutrition info per ¼ cup: 141 calories, 14g fat, 3.5g net carbs, 2g protein

Foods That Boost Your Immune System #1

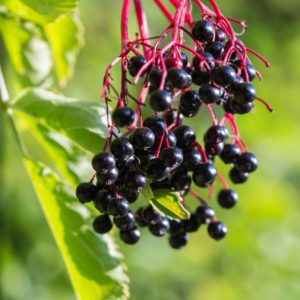
Elderberry

It’s an old folk remedy. This fruit is loaded with nutrients called antioxidants, and it may help fight inflammation. In some lab studies, an extract from the berries appears to block flu viruses. But scientists caution that more study is needed. You definitely still need to get a yearly flu vaccination!

Used for its antioxidant activity to lower cholesterol, improve vision, boost the immune system, improve heart health and for coughs, colds, flu, bacterial and viral infections and tonsillitis. Elderberry juice was used to treat a flu epidemic in Panama in 1995.

Beneficial components in Elderberries

Elderberries contain organic pigments, tannin, amino acids, carotenoids, flavonoids, sugar, rutin, viburnic acid, vitaman A and B and a large amount of vitamin C. They are also mildly laxative, a diuretic, and diaphoretic. Flavonoids, including quercetin, are believed to account for the therapeutic actions of the elderberry flowers and berries. According to test tube studies these flavonoids include anthocyanins that are powerful antioxidants and protect cells against damage.

Health Benefits of Elderberries

Elderberries were listed in the CRC Handbook of Medicinal Herbs as early as 1985, and are listed in the 2000 Mosby’s Nursing Drug reference for colds, flu, yeast infections, nasal and chest congestion, and hay fever. In Israel, Hasassah’s Oncology Lab has determined that elderberry stimulates the body’s immune system and they are treating cancer and AIDS patients with it. The wide range of medical benefits (from flu and colds to debilitating asthma, diabetes, and weight loss) is probably due to the enhancement of each individual’s immune system.

At the Bundesforschungsanstalt research center for food in Karlsruhe, Germany, scientists conducting studies on Elderberry showed that elderberry anthocyanins enhance immune function by boosting the production of cytokines. These unique proteins act as messengers in the immune system to help regulate immune response, thus helping to defend the body against disease. Further research indicated that anthocyanins found in elderberries possess appreciably more antioxidant capacity than either vitamin E or vitamin C.

Studies at Austria’s University of Graz found that elderberry extract reduces oxidation of low-density lipoprotein (LDL) cholesterol. Oxidation of LDL cholesterol is implicated in atherogenesis, thus contributing to cardiovascular disease.

Elderflowers are also used for their health benefits.

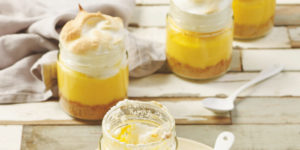
hCG Phase 3 and 4 Low Carb Lemon Meringue Cups

A wonderful easy sugar free lemon meringue pie that can be made hot or cold, and prepared in advance.

INGREDIENTS

Crumble base

¾ cup almond flour/meal

1 tbsp granulated sweetener of choice (or to taste)

½ tsp ground ginger

55g/ coconut oil melted

3 tbsp water

Lemon custard (curd)

6 egg yolks

1 whole egg

1½ tbsp granulated stevia powder

zest and juice of 2 lemons

110g / 1 stick butter

Meringue

6 egg whites

2 tbsp granulated sweetener of choice (or to taste)


INSTRUCTIONS

Crumble base

Mix all the ingredients together until the mixture resembles breadcrumbs, or biscuit crumbs.

Spread the crumble mixture over a baking tray lined with baking parchment.

Bake at 180C/350F for 10-15 minutes until golden. Turn once or twice in this time so the crumbs brown all over and cook until crispy.

Remove from the oven.


Lemon custard (curd)

While the crumble is baking, whisk together the egg yolks, whole egg, sweetener and lemon juice/zest in a saucepan.

Heat over a very gentle heat (whisking continuously) until it is a smooth custard consistency.

Add the butter and mix again while melting. Stir until thickened again.

Remove from the heat.


Meringue

Whisk the egg whites and sweetener until stiff peaks form.

Place 6 circles of meringue on a baking tray lined with baking parchment.

Bake at 180C/350F for 10 – 15 minutes, or until golden.

To assemble.

Divide the crumble mixture between the 6 glasses or mason jars.

Divide the lemon custard/curd on each of the bases.

Place a baked meringue on top of each to complete the sugar free & low carb lemon meringue pies.

Serve immediately or chill in the fridge until ready to serve.

NOTES

To serve hot, make the crumble base and lemon curd as shown. Layer the base and the curd in individual heatproof jars and cook the meringue directly on top of the sugar free lemon meringue pie.

To serve cold, prepare the 3 layers as shown then construct the sugar free lemon meringue pies and keep covered in the fridge until ready to serve. This way they can be made a day ahead.


hCG Phase 3 and 4 Low Carb Lemon Meringue Cups

A wonderful easy sugar free lemon meringue pie that can be made hot or cold, and prepared in advance.

INGREDIENTS

Crumble base

¾ cup almond flour/meal

1 tbsp granulated sweetener of choice (or to taste)

½ tsp ground ginger

55g/ coconut oil melted

3 tbsp water

Lemon custard (curd)

6 egg yolks

1 whole egg

1½ tbsp granulated stevia powder

zest and juice of 2 lemons

110g / 1 stick butter

Meringue

6 egg whites

2 tbsp granulated sweetener of choice (or to taste)

INSTRUCTIONS

Crumble base

Mix all the ingredients together until the mixture resembles breadcrumbs, or biscuit crumbs.

Spread the crumble mixture over a baking tray lined with baking parchment.

Bake at 180C/350F for 10-15 minutes until golden. Turn once or twice in this time so the crumbs brown all over and cook until crispy.

Remove from the oven.

Lemon custard (curd)

While the crumble is baking, whisk together the egg yolks, whole egg, sweetener and lemon juice/zest in a saucepan.

Heat over a very gentle heat (whisking continuously) until it is a smooth custard consistency.

Add the butter and mix again while melting. Stir until thickened again.

Remove from the heat.

Meringue

Whisk the egg whites and sweetener until stiff peaks form.

Place 6 circles of meringue on a baking tray lined with baking parchment.

Bake at 180C/350F for 10 – 15 minutes, or until golden.

To assemble.

Divide the crumble mixture between the 6 glasses or mason jars.

Divide the lemon custard/curd on each of the bases.

Place a baked meringue on top of each to complete the sugar free & low carb lemon meringue pies.

Serve immediately or chill in the fridge until ready to serve.

NOTES

To serve hot, make the crumble base and lemon curd as shown. Layer the base and the curd in individual heatproof jars and cook the meringue directly on top of the sugar free lemon meringue pie.

To serve cold, prepare the 3 layers as shown then construct the sugar free lemon meringue pies and keep covered in the fridge until ready to serve. This way they can be made a day ahead.

Reasons to Eat Real Food Conclusion

Real Food Helps Support Local Farmers

Purchasing produce from farmers’ markets, along with meat and dairy products from local farms, supports the people who grow food in your community.

In addition, these are often much fresher and less processed than the foods you get at the supermarket.

Real Food Is Delicious

In addition to all of the other reasons to eat real food, it truly tastes delicious.

The amazing flavor of fresh, unprocessed food is undeniable.

Once your taste buds have adjusted to real food, processed junk food simply can’t compare.

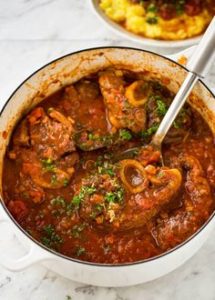
hCG phase 3 and 4 Osso Buco

This is one awesome recipe – I love it and hope you will too.

INGREDIENTS

1.8kg veal shank, cut across the bone in 2 slices

2 tablespoons coconut oil

1 small onion, chopped

1 small carrots, chopped

3 garlic cloves, chopped

1 teaspoon salt

1 cup diced tomatoes, with their juice

1 cup dry white wine

1 teaspoon dried oregano leaves

2 tablespoons lemon zest or 2 strips lemon peel (2 x 1/2-inch)

1 tablespoon unsalted butter

1 tablespoon grated Parmesan

1/4 cup chopped Italian parsley

DIRECTIONS

In a large, heavy-bottomed pot, heat oil over medium heat. Pat shanks dry, sprinkle with salt and pepper. Brown in oil, two or three at a time. Transfer to a plate.

Add onion, carrot, garlic and salt to the pan and cook 5 minutes, until tender. Add tomatoes, wine and oregano. Return veal to pot.

Bring to a boil, reduce heat to low. Simmer until veal is very tender, about 1 1/2 hours. Transfer veal to a serving platter.

Cook sauce, uncovered 10 minutes more, until slightly thickened; remove lemon peel. Add parsley. Pour sauce over shanks.

NOTE:

I adapted this recipe for Phase 2 when I felt like having Osso Buco, and you can too.  Just leave off the items that you cannot have.

hCG phase 3 and4 Osso Buco

This is one awesome recipe – I love it and hope you will too.

INGREDIENTS

1.8kg veal shank, cut across the bone in 2 slices

2 tablespoons coconut oil

1 small onion, chopped

1 small carrots, chopped

3 garlic cloves, chopped

1 teaspoon salt

1 cup diced tomatoes, with their juice

1 cup dry white wine

1 teaspoon dried oregano leaves

2 tablespoons lemon zest or 2 strips lemon peel (2 x 1/2-inch)

1 tablespoon unsalted butter

1 tablespoon grated Parmesan

1/4 cup chopped Italian parsley

DIRECTIONS

In a large, heavy-bottomed pot, heat oil over medium heat. Pat shanks dry, sprinkle with salt and pepper. Brown in oil, two or three at a time. Transfer to a plate.

Add onion, carrot, garlic and salt to the pan and cook 5 minutes, until tender. Add tomatoes, wine and oregano. Return veal to pot.

Bring to a boil, reduce heat to low. Simmer until veal is very tender, about 1 1/2 hours. Transfer veal to a serving platter.

Cook sauce, uncovered 10 minutes more, until slightly thickened; remove lemon peel. Add parsley. Pour sauce over shanks.

NOTE:

I adapted this recipe for Phase 2 when I felt like having Osso Buco, and you can too.  Just leave off the items that you cannot have.